
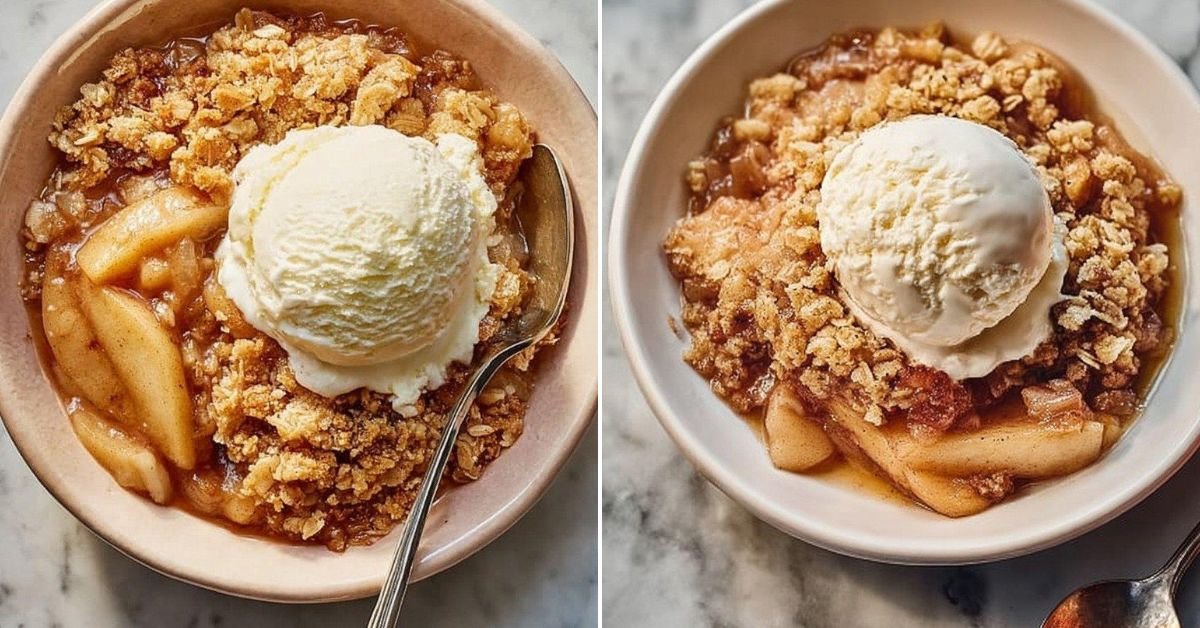
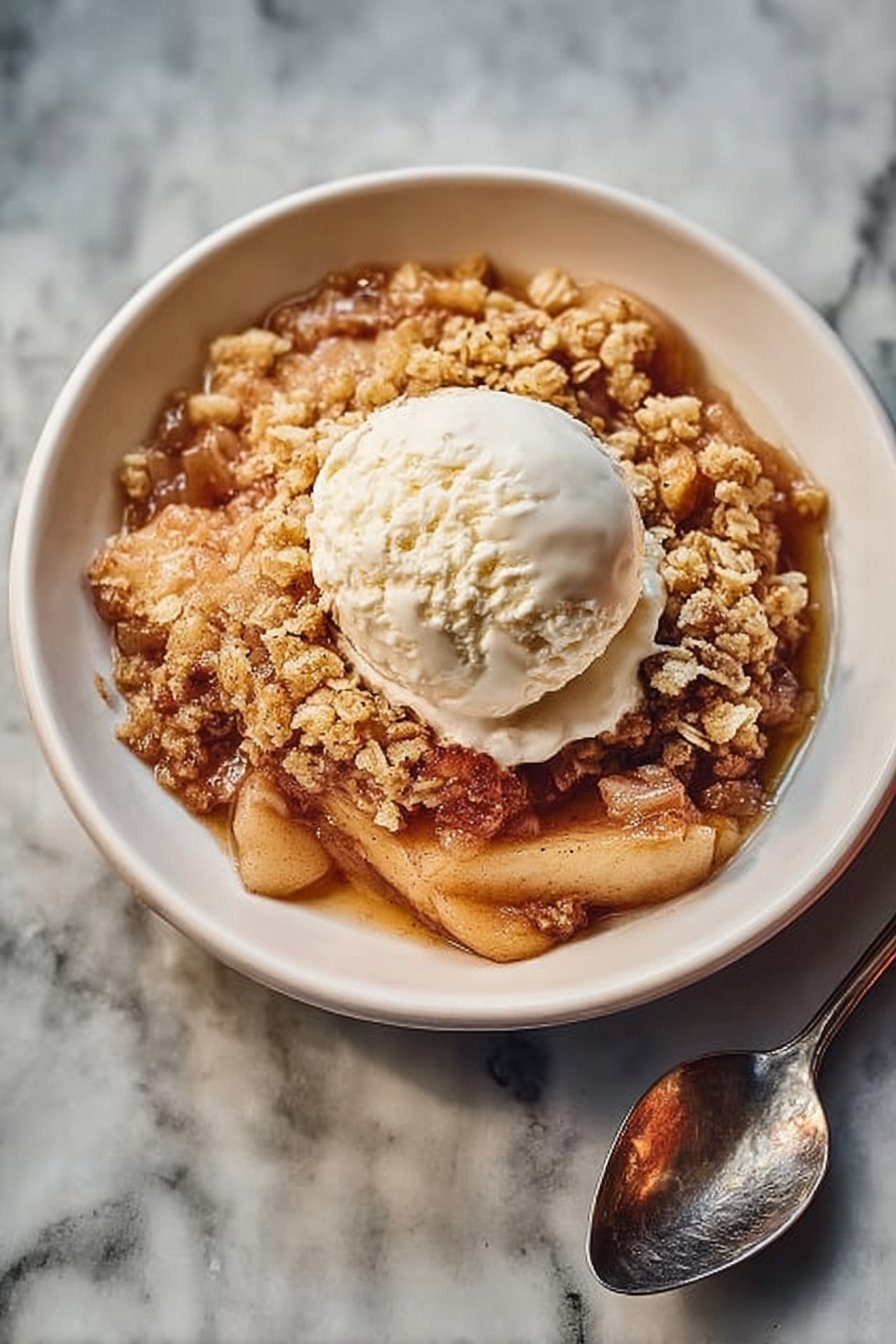
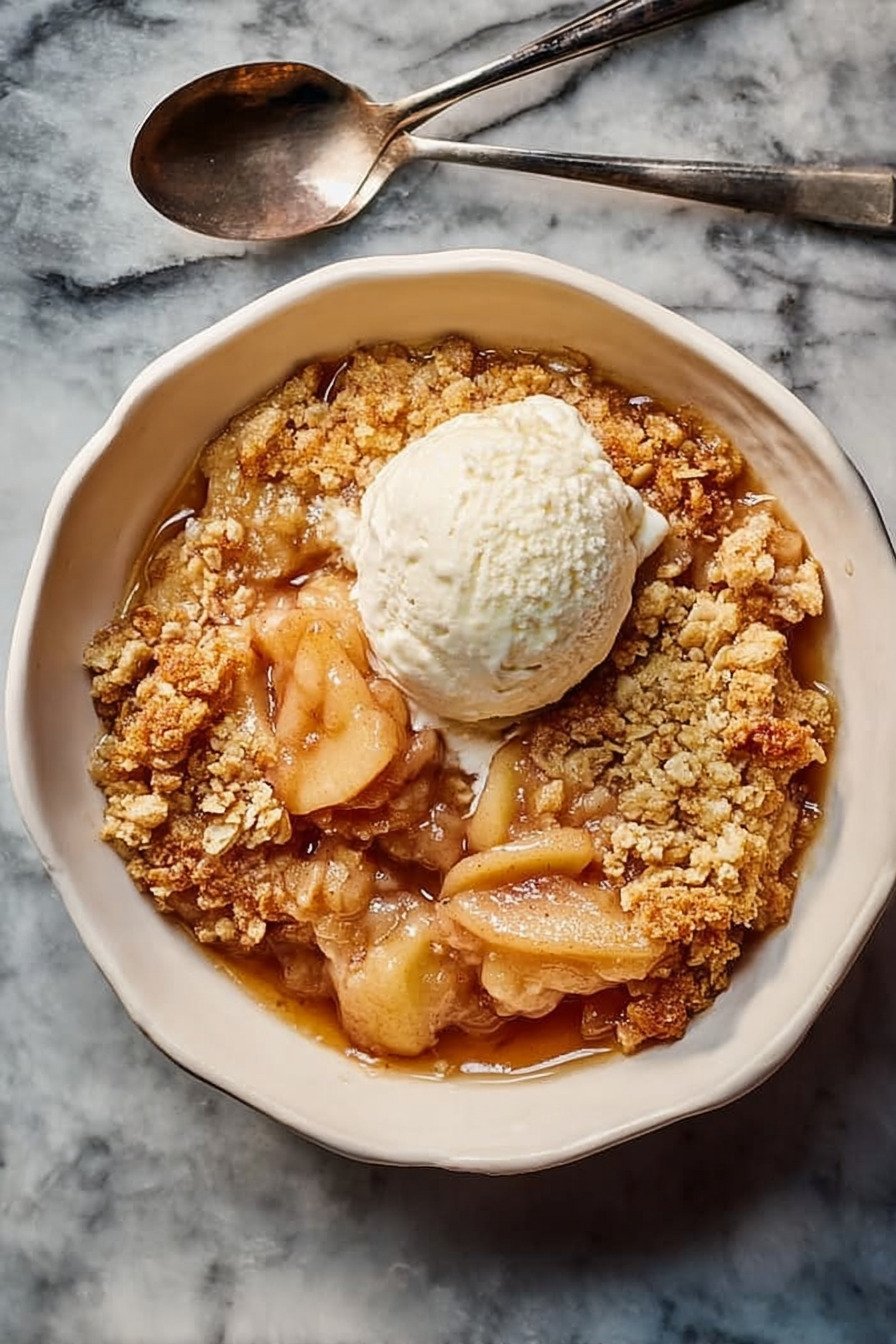
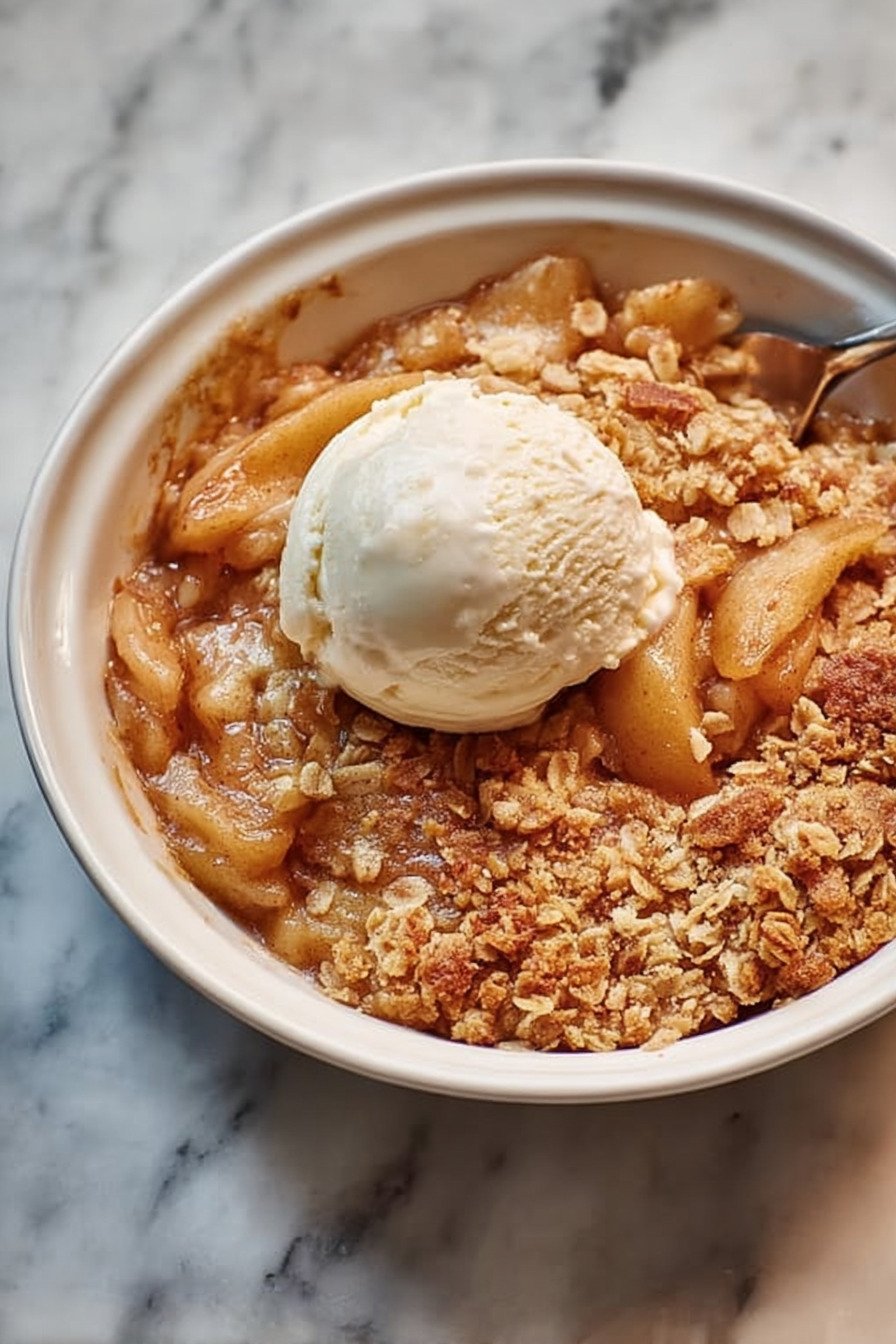
Apples were practically begging to be baked, and I couldn’t resist. This old-fashioned apple crisp recipe is my go-to every fall. Why? Because it’s warm, cozy, and loaded with cinnamon-kissed apples under a buttery oat topping that crackles just right. And yes—it’s even better with a scoop of vanilla ice cream that melts into every crevice. If you’ve ever had a dessert that made you stop mid-bite and smile, this is that dessert. It’s simple, stress-free, and doesn’t require fancy techniques or special equipment. Peel some apples, toss a few pantry staples, and your kitchen starts to smell like an autumn dream. No pie crusts to roll out, no complicated steps. I’ve made this for family gatherings, weeknight cravings, and even Thanksgiving when I didn’t feel like making a whole pie. If you’re new to baking or just want a recipe that always delivers, trust me—this is the one. Let’s grab some apples and get to it.
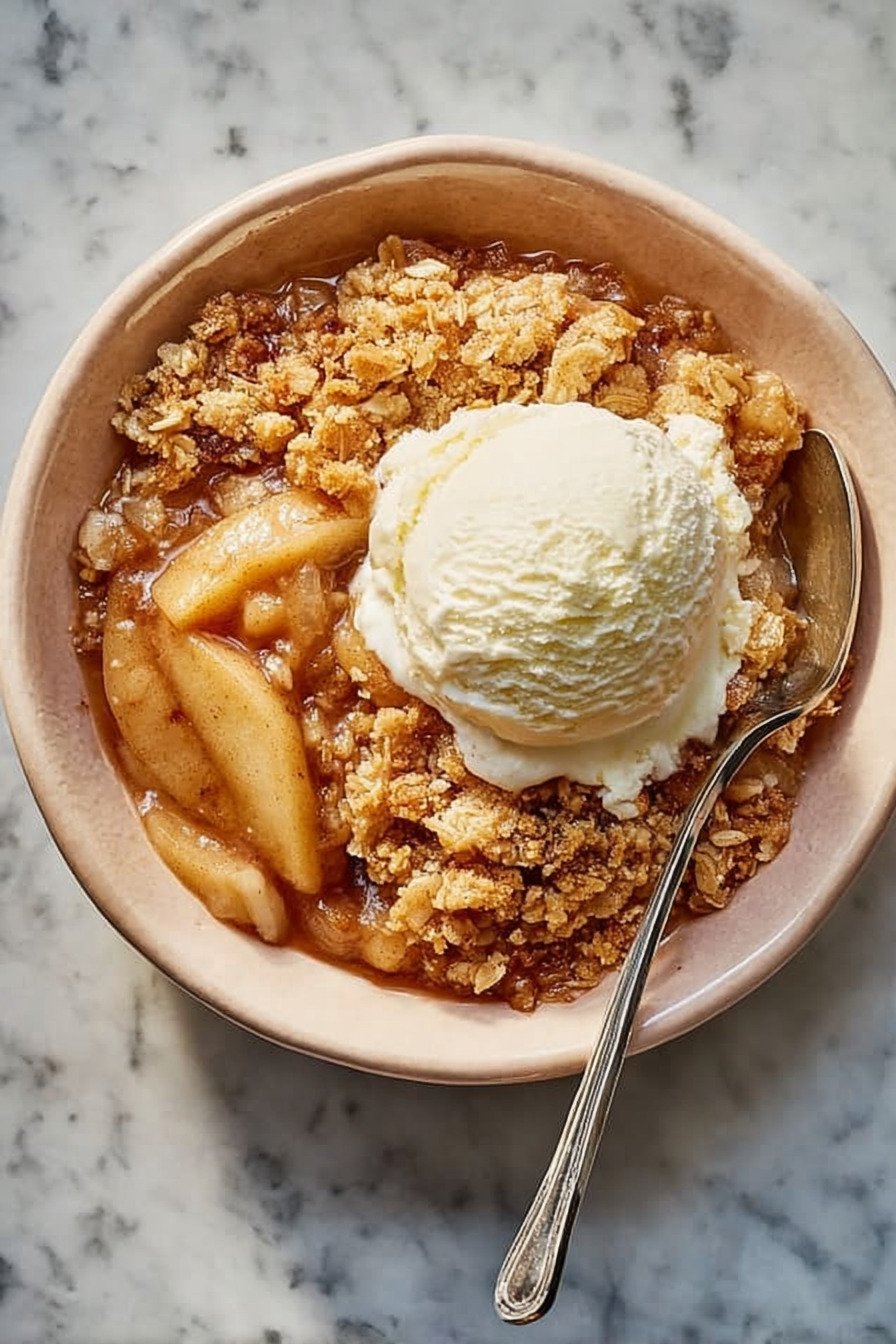
Table of Contents
- 1) Key Takeaways
- 2) Easy Old-Fashioned Apple Crisp Recipe
- 3) Ingredients for Old-Fashioned Apple Crisp
- 4) How to Make Old-Fashioned Apple Crisp
- 5) Tips for Making Old-Fashioned Apple Crisp
- 6) Making Old-Fashioned Apple Crisp Ahead of Time
- 7) Storing Leftover Old-Fashioned Apple Crisp
- 8) Try these Desserts next!
- 9) Old-Fashioned Apple Crisp
- 10) Nutrition
1) Key Takeaways
- You don’t need a pie crust to make a killer apple dessert
- Oats and butter make the ultimate crunchy topping
- This is one of those sweet easy recipes you’ll come back to every fall
- Works with most apple varieties—just use what you like
2) Easy Old-Fashioned Apple Crisp Recipe
I never met an apple dessert I didn’t like, but this one’s something special. Every year when apples flood the market, I find myself skipping the complicated pies and reaching for this easy apple crisp recipe. It has all the comfort of a homemade dessert without the need for rolling pins, lattice crusts, or crossed fingers.
The topping hits all the right notes: crispy, golden, buttery. The apples? Soft and cozy underneath. There’s nothing fancy here, just the magic of fresh fruit baked under something crunchy. It’s one of those sweet easy recipes that wins over both new bakers and seasoned pros alike.
Serve it warm, serve it cold, eat it straight out of the dish with a spoon (no shame here). It’s dependable, deeply satisfying, and oh-so-forgiving. Mess up a little on the measurements? You’ll still get something delicious. I’ve made it for holidays, breakups, lazy Sundays—you name it.
3) Ingredients for Old-Fashioned Apple Crisp
Apples: Choose a firm variety like Honeycrisp or Granny Smith. They hold up under heat and give that tart-sweet bite that makes the whole dessert sing.
Orange and Lemon Zest: These give the apples a tiny citrus kick. It keeps the flavor bright, even after baking. I always zest first, juice later—learned that one the sticky way.
Fresh Orange and Lemon Juice: Just a splash of each helps balance the sweetness. Don’t skip it—your apples will thank you.
Granulated Sugar: I use this in the filling to sweeten the apples and draw out their juices.
Ground Cinnamon and Nutmeg: These spices wrap the apples in warmth. Just the smell alone could sell your house in minutes.
All-Purpose Flour: This goes into the topping. It helps hold things together without making it cakey.
Light Brown Sugar: It adds caramel vibes to the topping. I press it into the measuring cup to get an accurate read.
Kosher Salt: Just a bit. It balances the sweetness and sharpens the flavor.
Old-Fashioned Oats: They toast up nicely and give the topping that signature crunch.
Cold Unsalted Butter: Dice it small and mix with your fingers. The colder the better—this is the stuff of sweet crisp dreams.
4) How to Make Old-Fashioned Apple Crisp
Step 1. Preheat your oven to 350°F. That way it’s ready by the time you’ve peeled your apples. I always forget this part and regret it when I’m staring at the oven light for 10 minutes.
Step 2. Peel, core, and slice the apples. Go thick or thin, but try to stay consistent so they cook evenly. Throw them in a big bowl.
Step 3. Add your zest, juice, sugar, cinnamon, and nutmeg to the apples. Stir with your hands or a big spoon—whatever gets them well coated.
Step 4. Pour the apple mixture into a 9 by 13 baking dish. Spread them out a little so every piece gets some love from the topping.
Step 5. Now for the topping: mix the flour, sugars, salt, and oats in a second bowl. Give it a stir to combine.
Step 6. Add the diced butter. Use your fingers to work it into the dry ingredients until it looks like chunky wet sand. If your hands melt the butter, chill it all for a few minutes and try again.
Step 7. Sprinkle the topping over the apples. Don’t press it down—let it sit loose and crumbly.
Step 8. Bake for about an hour until the top is golden brown and the apples are bubbling around the edges. Let it rest for a bit before serving. I know it’s hard to wait.
5) Tips for Making Old-Fashioned Apple Crisp
Pick the right apples. You want a mix of tart and sweet for depth. Avoid Red Delicious—they go mushy fast.
Cold butter is your friend. It’s what makes the topping crisp and flaky, not greasy. Cut it small and don’t overmix.
Don’t pack the topping. Let it fall naturally over the apples. The air pockets help it stay light and crunchy.
This dish is one of those quick and easy dessert recipes that doesn’t need precision. You can be a little off and still get great results.
If you’re feeling bold, add some chopped nuts or swap oats for granola. That little twist can make this recipe your own.
6) Making Old-Fashioned Apple Crisp Ahead of Time
You can assemble everything up to the point of baking and stash it in the fridge overnight. When you’re ready, bake it straight from cold and add 10 minutes to the cooking time.
The topping holds well even when prepped early. I like to make a double batch and freeze one. That way, I’ve got dessert covered when guests show up unannounced (looking at you, Aunt Patty).
One of the best things about sweet easy recipes like this one is that they forgive your schedule. No pressure, no stress—just apples and comfort on demand.
7) Storing Leftover Old-Fashioned Apple Crisp
Got leftovers? Lucky you. Let the crisp cool, then cover it tightly or transfer to a container. It keeps in the fridge for up to 4 days.
Reheat it in the oven at 300°F for 10 minutes to revive the topping. The microwave works too, but it softens the crunch a bit.
This is where the magic of sweet easy recipes shines again. Cold or warm, solo or with ice cream—leftover apple crisp always feels like a win.
8) Try these Desserts next!


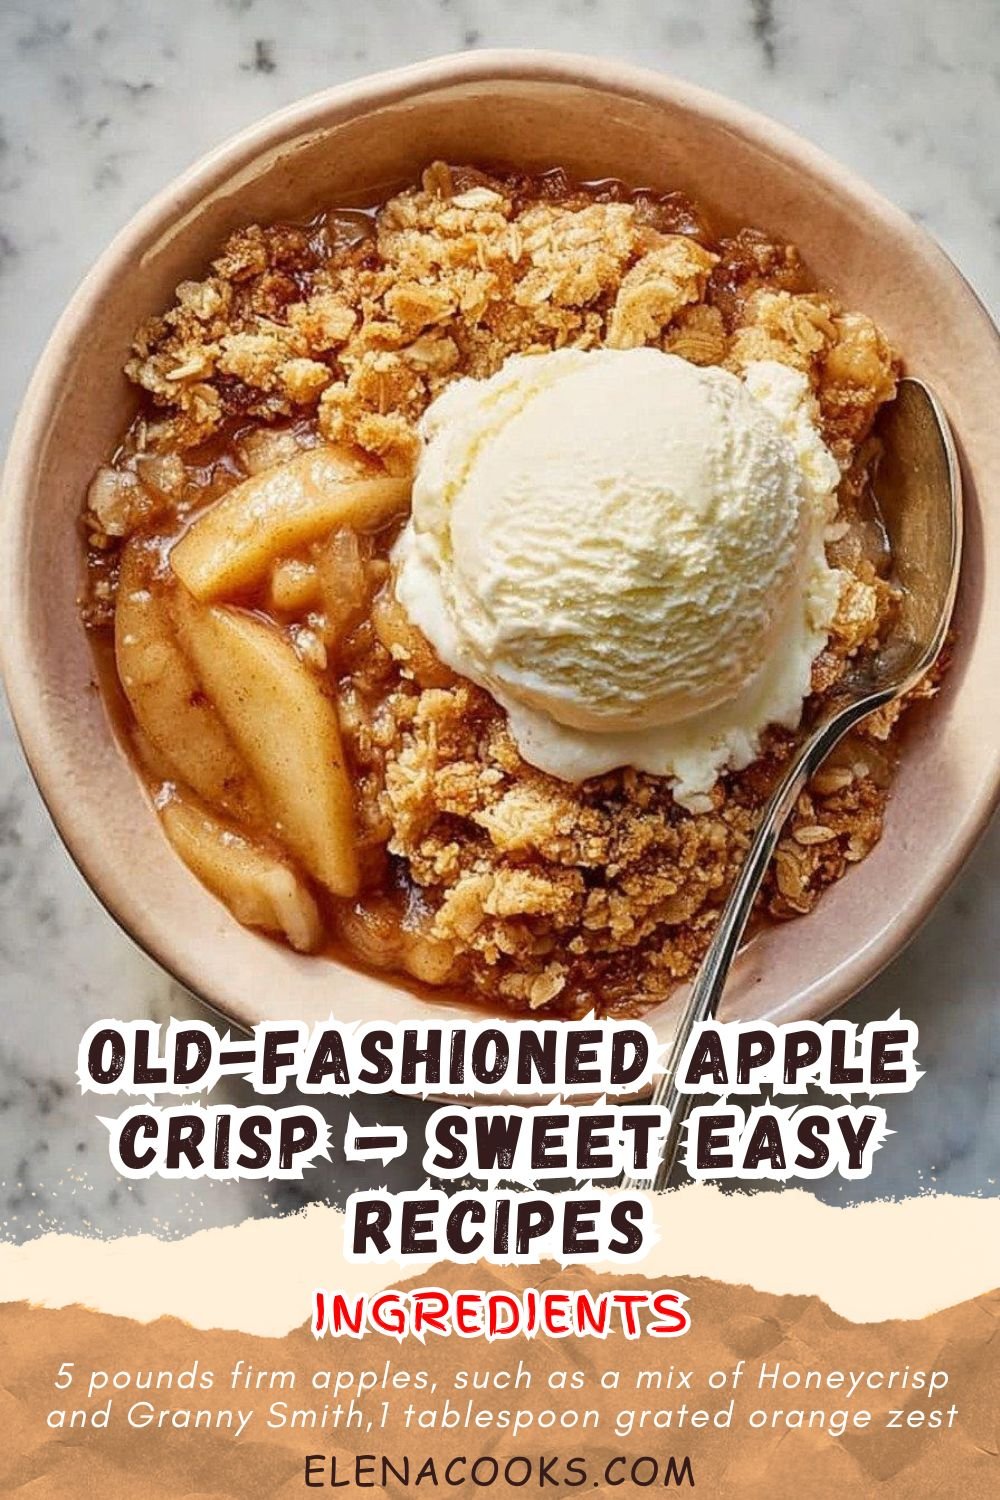
9) Old-Fashioned Apple Crisp
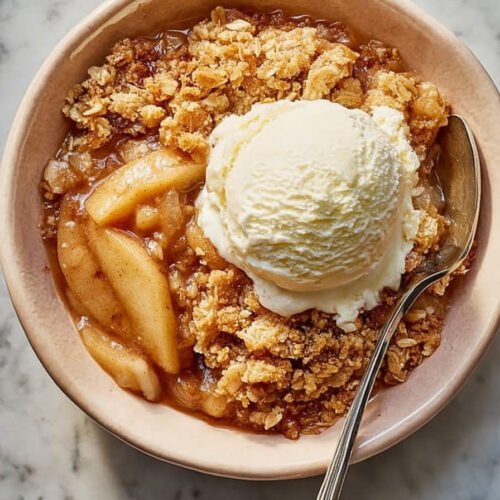
Old-Fashioned Apple Crisp – Sweet Easy Recipes for a Cozy Treat
Ingredients
- 5 pounds firm apples, such as a mix of Honeycrisp and Granny Smith
- 1 tablespoon grated orange zest
- 1 tablespoon grated lemon zest
- 2 tablespoons freshly squeezed orange juice
- 2 tablespoons freshly squeezed lemon juice
- 1/2 cup granulated sugar
- 2 teaspoons ground cinnamon
- 1 teaspoon ground nutmeg
- 1 1/2 cups all-purpose flour
- 3/4 cup granulated sugar
- 3/4 cup light brown sugar, packed
- 1/2 teaspoon kosher salt
- 1 cup old-fashioned oats
- 1/2 pound (2 sticks) cold unsalted butter, diced
Instructions
- Preheat your oven to 350°F (175°C).
- Peel, core, and slice the apples. I like a mix of tart and sweet apples for balance.
- In a large bowl, toss the apples with both zests, both juices, 1/2 cup sugar, cinnamon, and nutmeg.
- Spread the apple mixture evenly in a 9×13-inch baking dish.
- In another bowl, mix the flour, both sugars, salt, and oats.
- Add the cold diced butter and use your fingers (or a pastry cutter) to mix until crumbly.
- Sprinkle the topping evenly over the apples. Don’t press it down—let it fall like apple crisp snow.
- Bake for about 60 minutes until the topping is golden and the apple juices are bubbling.
- Let it cool slightly (if you can wait), and serve warm with ice cream or whipped cream.
10) Nutrition
Serving Size: 1/8 of the crisp, Calories: 410, Sugar: 38 g, Sodium: 170 mg, Fat: 17 g, Saturated Fat: 10 g, Carbohydrates: 65 g, Fiber: 5 g, Protein: 3 g, Cholesterol: 45 mg


Leave a Comment